Sunday, June 9, 2013

80's inspired eye make up

Hello Gorgeous Ladies!

It has been truly a great weekend for me. Chill, spent time with fam bam and my love. Nothing to do really, when I came across ASAP 18. They have showcased 80's music and dance-- and there came my inspiration for this make up look.

Vibrant and playful-- like a rainbow! Do not be afraid to combine colors. Always remember blending is the key.

In this tutorial, I have only used 1 palette. I purchased this online in a multiply site of Legally Vain. By the way, they also sell beautiful make up traincases and more palettes.

Below is my step by step tutorial in creating a fun and colorful eye make up. I am so sure this will remind you of a rainbow!

1. Always remember to prime your eyelids. This will prolong the staying power of your eyeshadow and will prevent from creasing especially if you have oily eyelids. In this look, I used my NYX JUmbo pencil in Milk. The whiteness and the consistency will make my eyeshadow pop more. The heat of your finger will make it more blendable.


2. Blend in your yellow eyeshadow. You may opt for a matte yellow. But this, I prefer a slightly shimmering eyeshadow as I would like to attract more light in photos. Blend it all across your eyelids up to the crease.


3. Blend in a bright pink in the outer half of your eyelids. Make sure you blend it well and will have a gradient transition from yellow to pink.
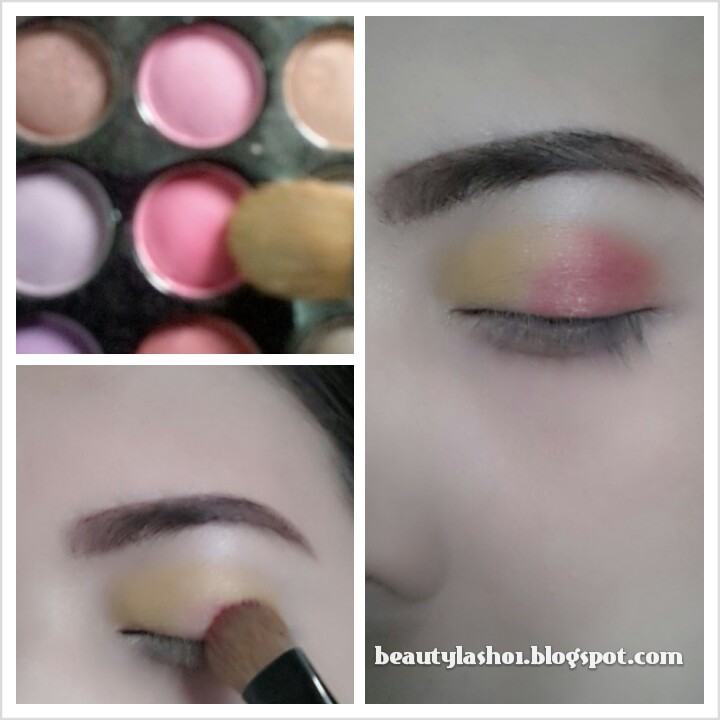

4. In your outer "V" blend in bright violet eyeshadow. This will emphasize the shape of your eyes. Also, this will create an illusion of a deep set eyes.


5. Using a thin and precise eyeshadow brush, blend in black eyeshadow to cut crease. Blend it well, this will contour a deep set eyes.


6. To make this eyeshadow more vibrant, using your round eyeshadow brush, blend in bright blue eyeshadow. (this color is very 80's) :) Apply it the out part of the eye. Blend, blend and blend my love!


7. Using your small eyes shadow brush, highlight your inner tearduct using a champagne eyeshadow color.


8. To balance the eye make up, blend in the same blue eyeshadow to the outer 3/4 of your lower lashline. Line your waterline with black eye pencil and blend it well. Line your eyelids with black eyeliner (very thinly) as close to your lashes. Curl your lashes and apply mascara. I put on some falsies baby for this look for a more dramatic effect.


And here is the finish look. I am so in love with this make up and I will definitely try it again for parties and girls night out.


Hope you enjoy this tutorial and may you find it helpful.
Follow me on:
Instagram: aprilvida
Facebook: Beautylash01 by April Vida

Have a great ahead and God Bless,
xoxo Beautylash01

Sunday, June 2, 2013

Neutral Smokey Eyes.. Perfect for First date or Clubbing

I'm back my loves been missing in action lately! :P

I have been loving my go-to smokey eyes lately and been receiving requests on a step by step tutorial how I do it.  I used affordable make up for this look. I am just not sure if Forever21 still has this eyeshadow quad available here in the Philippines. But you can definitely substitute this look using same shades of eyeshadows.

Let us get this going:

Product I used:
ELF Quad, NUYTX Jumbo pencil in Milk (available from Digital Traincase, Forever21 Quad Shadow (dupe for Naked1), Black eyeliner, liquid eyeliner, Saizen Quad, Saizen Falsies, Charm fluffy tapered brush, Suesh eyeshadow flat brush, Artist Studio pencil brush

Note: You have the option to do your eyes make up first before doing your foundation. This method will avoid eyeshadow fall-outs. Fall outs ruin make up!! But on my case, since I have been doing this almost everyday I did my foundation routine already beforehand.

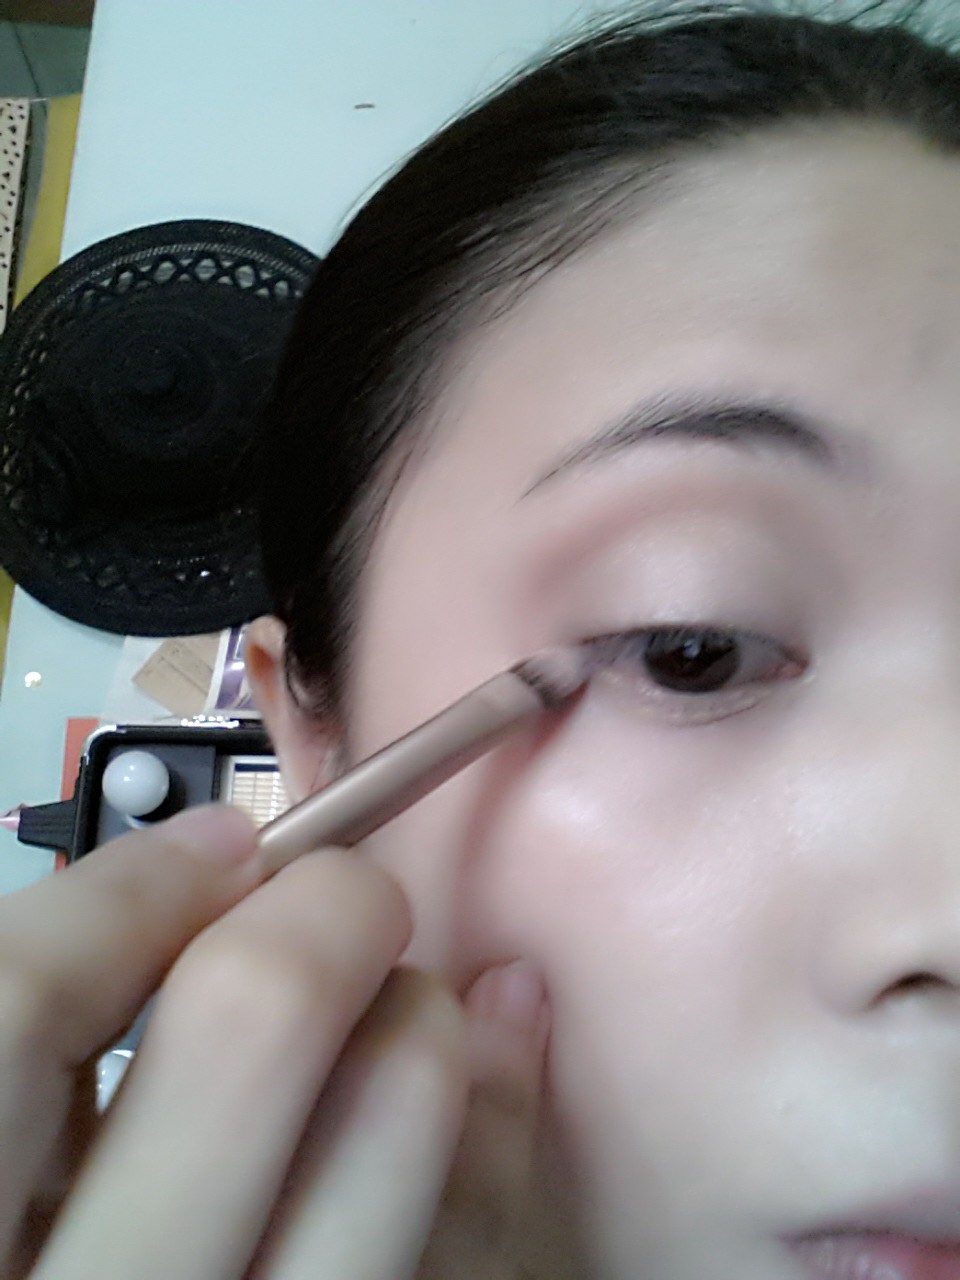
1. Using NYX jumbo pencil in milk, prime your eyelids. This will make your eyeshadow pop and lasts longer. I use my ring finger in blending the product. The natural heat of the finger will melt and blend the product.


2. Using your flat eyeshadow brush, pat in Warm Brown eyeshadow all across your eyelid. Blend the harsh edges using your fluffy shadow brush.


3. To create dimension on your eyes, blend in Dark brown eyeshadow in the outer "V" of your eyes. Remember blend the harsh edges to create a gradient effect.


4. For a deeper smokey look, blend in your dark grey eyeshadow (closely black) to the outer "V" again of your eyes to make a deep set look.


5. Using a small flat eyeshadow brush, highlight your browbone and inner tearduct with a white shimmering eyeshadow.


6. Using the same small flat eyeshadow brush, line 3/4 of your lowerlashine using dark brown eyeshadow connect it with upper eyeshadow. This will balance the smokiness of your eye make up.


7. Apply liquid eyeliner (depending on your choice). Apply as close to your lashes. Line 3/4 of your waterline with black eyeliner. Blend it with the dark brown eyeshadow.

8. Curl your lashes and apply generous amount of mascara. (everyday look), OR you may go ahead and apply false lashes for a more dramatic look (perfect for clubbing).


9. Generally, you want your eyes to be the centre of your look, use any nude lipstick or baby pink. In my case, I am loving my Sophie Martin Lipstick in shade baby pale pink. The shade is so close to my natural lip color.


And here is my before and after photo for this make up tutorial


I hope you will find this tutorial very helpful. Please recreate this look and tag me in my instagram account or FB Fan page. I would love to see your beautiful creation.
Instagram: @aprilvida
FB: Beautylash01 by April Vida
xoxo, Beautylash01
Sunday, May 12, 2013

How to Contour and Highlight

It is no doubt that I love contouring and highlighting. It generally creates an illusion of having a slimmer face, more pointed nose and defined jaw. It brings back the dimension to your face after washed by your powder application. It may seem to be complicated but it very easy to achieve. You may substitute the product that I will use depending on your budget.


Make up and tools needed:

BH Cosmetics Contour / Highlight palette, Benefit Hoola, ELF Luminance, angled brush, fluffy eyeshadow brush

1. Identify the area where the light will reflect. Refer on the photo above with white highlighting concealer.

2. Identify the area where you need dimenion. These are basically your hollows of your cheeks, temples and jawline. These are the areas that typically has been washed off and makes our face flat on photos.

3. If you will use a liquid highlighter, gently blend it using a sponge or your fingers.

4. Make a fish face to identify the hollows of your cheeks. The key in contouring is blending. Using you flat angled brush gently blend your contour powder until it creates a subtle effect.


5. Gently blend the contour powder in your temples and connect it to the cheeks as if you are creating an inverted letter "C".


6. To define your nose and make it slimmer or pointer, gently blend in from the tip of you eyebrows down to the tip of your nose. This will elaborate your nose further especially in photos and would truly compliment with your brows.


7. Dont forget to sweep some contour powder to your jawline to create an illusion of long and thinner neck.

8. To further highlight, gently pat and blend your highlighting powder (ELF Luminance) to the areas where we blended our ELF Highlighting concealer.


Now, you can see the difference of a flat face with a contoured and highlighted face.


Stay gorgeous and pray always!
xoxo, Beautylash01

Fresh Everyday look using Urban Decay Naked Palette 2

Hello Lovies!

I hope you all had a fantastic weekend. I am looking forward in sharing with you my latest go-to make up everyday. I have been loving my Urban Decay Naked Palette 2 because of the array of neutral colors that you can play around-- from office look to party look.

I am glad to show you guys my step by step eye make up look:

Make up and tools needed:

Urban Decay Naked Palette 2, ELF Translucent Powder, ELF  blush, Carmex, San San concealer, Nichido Foundation, Urban Decay Primer potion, Ever Bilena Mascara, Shu Uemura Curlur, Face Shop Eyebrow pencil, Shadow brush and Tapered Brush

1. Do your foundation and concealing routine. (you may check my previous blog on my concealing routine).

2. Go ahead and and shape your brows. (you may check my previous blog on how I do my eyebrows).

3. Prime your eyes using your eye primer. Gently pat it in and blend.


4. Once blended, gently pat in Bootycall all over the eyelids.


5. Using a tapered brush, pat some Tease on your crease. and gently blend it in a wind shield motion.


6. To define your eyes and create an illusion of fuller eyes, gently pat in Suspect at the outer V of your eyes. Remember, blending is the key for a gradient effect.


7. To fully open the eyes as well as to balance your eye make up, gently pat in your outer lower lash line using Suspect.


8. Highlight the inner corner of the eyes, using Half-baked.


9. Highlight your eyebrows using Foxy.


10. Apply a very thin line of liquid eyeliner or any liner of your choice.
11. Curl your lashes and apply mascara.

Here is the finish look of your Everyday make up using Naked Palette 2. This look is also good for office make-up.


I hope this simple eye make up tutorial would be very helpful for all your Lovies out there. You may go substitute this look using same shade of the eyeshadows I have used. Remember, blending is the key!

xoxo, Beautylash01


Saturday, May 4, 2013

Review: Maybelline Baby Skin Pore Eraser

Hello their gorgeous friends! Pores, pores and pores. I have been in search for an affordable pore minimizer / primer for my everyday use. I just finished my Victoria's Secret Airbrush primer and I do not want to spend Php 1600 for Benefit Porefessional and it is over my budget. Yes, I am thrifty sometimes. :P

Now I came across this Maybelline Pore Eraser in PCX, Powerplant. I tested the product and immediately after a few seconds, I felt the smoothness in my skin. I immediately, check the ingredients and Silica is one of it, Silicone plays a big role in make up, it makes the skin less oily, more mattifyed and creates a good canvass. This baby also contains Cherry Extract, it is known for their antioxidant properties and definitely good for our skin too. No questions asked, I purchased the product. It is very affordable, it costs me Php 299 for a tube of 22 ml.

I believe, the weather we have right now in the Philippines would truly test the effect and longevity of this Pore Eraser. The humidity and scorching heat really melts our make-up.. (Agree??) Let me share with you the packaging of the product
The tube reminds me of Benefit Porefessional, it is lightweight and very handy. Wont actually consume much space in your make up bag or traincase.

Consistency wise, it comes in a gel-like / creamy texture (somewhere in between).

Pea-sized amount will go a long way. Apply it evenly on your clean face before applying your foundation. This will help your foundation-application much more easier since your skin will be smoother. I have pores in my face and let us test this product's claim to fame.

On the left side, pores are very visible. After applying the Maybelline Baby Skin Pore Eraser, it is lessens the pores and my skin was less oily.

Here is my photo when I used this product:


I applied my make up around 7AM and I took this photo around 12 noon with no retouch and I was under the scorching heat of the sun for 10 minutes hailing a cab.

I think this product is a good steal! Will I repurchase this product again? A big YES for me!!!! I just hope that this product will be a permanent one for Maybelline. :)

xoxo, Beautylash01

Thursday, May 2, 2013

Tutorial: All about Eyebrows

Hello Friends! I am back again for another tutorial and we will focus on our EYEBROWS. Sometimes, we take for granted this routine in our makeup; either we are in a hurry or perhaps we are clueless how to do it.

Let us keep in mind that eyebrows are only sisters and they are not identical twins. It is most likely that 1 of your brow is much more tamed than the other. Eyebrows create our face frame. If your brows are well groomed it will make a very big difference.

There are different tools where we can transform your brows from owww to wow!  In shaping your brows you have to consider your face shape. Below are the suggested shape of brows as determined by your face shape:

1. Oval shape: slightly arched brows or soft angled shape
2. Heart shape: slightly curved brows. Curves will create a beautiful heart shape using the point of your chin as the heart bottom and the brows as the top of the heart. 
3. Long shape: slightly flat with arched at end of the brows, this will create an illusion of a shorter face.
4. Round shape: high arched brows, this will create an illusion of a longer face.
5. Square shape: Balance this strong feature by a strong brow softwith curves.
6. Diamond shape: strong curves and arched brows will make the widest part of the face less wide. curves will soften the look.

Eyebrow color: 

We should keep in mind the color of our brows should compliment and match our hair. This is a MUST!  If your hair color is:

Blond: use ash blond of light gray pencil or shadow
Light brown: medium to light brown pencil or shadow
Red: ash blond or caramel pencil or shadow
Brunette: mahogany or warm brown pencil or shadow
Black : dark brown or dark gray pencil or shadow

Now let me share with you how I groom and do my brows.
Tools needed:


1. Spoolie or an improvised clean mascara wand
2. Angled eyebrow brush, I got mine from Suesh
3. Flat shadow brush
4. Tweezers
5. Small scissors
6. Brow blade

Make up products needed:
(May depend on your preference)


1. Benefit eyebrow wax
2. NYx jumbo pencil in dark brown (I just deported mine since I do not have a sharpener to fit this size ;) )
3. Faceshop eyebrow pencils in brown
4. Nichido pencil concealer in Beige to clean the edges and highlights too.

Here it goes:
1. Using your spoolie, gently brush your brows to define its natural shape.


2. Noticing I have some long brows, I usually groom it at times. (this step is optional).


3. Using your angled brush, create an illusion or your desired shape. (Consider your face shape on this). I either use an eyebrow wax or my depot-ted NYX Jumbo pencil in Dark Brown. The consistency of both product (wax or cream-based) makes the shaping easier.


4. Outline your brows top portion first then followed by lower portion. Outlined brows should look like this:


5. Fill in your brows. You may use eyebrow pencil or a matte brown eyeshadow.

** This is optional, after filling in your brows, you may go ahead and tint it with Eyebrow tint. A good choice if you are on a budget, try Etude House Color my brows, OR if you have the budget, MAC's girlboy is a good choice too.

6. Blend the shadow or pencil to soften the look.


7. Once blended, outline and clean the harsh edges by applying a pencil concealer or any concealer. This step will highlight the brows and will elaborate the shape.


8. Final step, is to check your brows. Checking your brows need some Geometry.. :) This picture will be very helpful. Using your nose as your focal point.


Sharing some photos of the finished look. :)


I hope you would find these information relevant. :) Thank you Lovelies and have a gorgeous day ahead!
xoxo, Beautylash01